Previously, I discussed how I built an open source universal remote using a RaspberryPi, an expansion board, and a NodeJS web application. This device allows me to control any infrared device in my home from my phone, smart watch, laptop, or other web connected device. I use the remote daily, and it’s sparked my curiosity to devise new ways of enhancing my environment with internet connected devices.
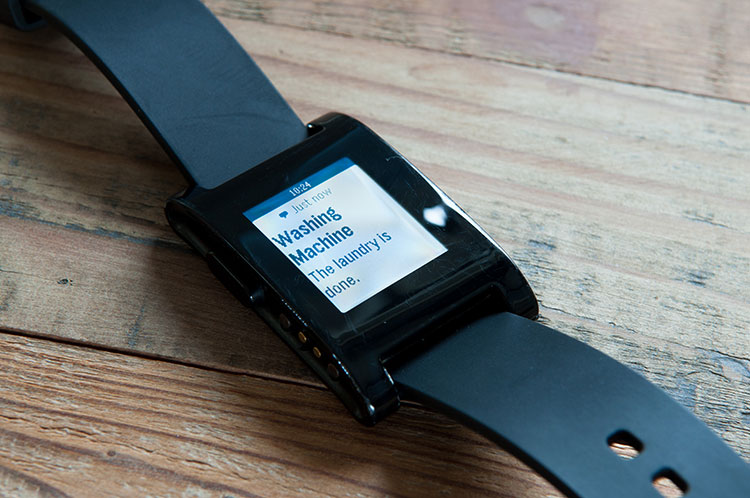
In this post, I’m going to cover a new project I recently finished - creating a device that monitors a washer or dryer and sends a text message when it detects that a load of laundry has finished. Beyond the novelty and simplicity of receiving a text message when the laundry is done, I built this device for two reasons. First, I wanted a project that introduced me to accelerometers - a sensor I’ve wanted to work with. Second, I wanted to take another stab at applying the principles of progressive enhancement, a web software concept, to the physical world.
“Progressive enhancement uses web technologies in a layered fashion that allows everyone to access the basic content and functionality of a web page, […] while also providing an enhanced version of the page to those with more advanced browser software […].” (Wikipedia)
I wanted to see if I could apply the concept of progressive enhancement to the physical world by enhancing an existing appliance (in this case, a washer or dryer) with new digital functionality - without modifying it’s existing form or interface. I wanted the appliance to look and behave exactly as it did before the modification, and I wanted no visual evidence that my device had been installed. After some brainstorming, I came up with an approach that met my goals. Read on to learn how I build it, and how you can build one yourself.
Overview
At a high level, the project works as follows: a 3D printed enclosure magnetically attaches to the outside of the washer or dryer. Inside the enclosure is an Electric Imp microcontroller and an ADXL335 accelerometer. The accelerometer measures the vibrations of the washer and dryer. The microcontroller has firmware on it that samples the accelerometer, processes the output, and periodically sends a computed result to a server in the cloud. The server receives the output and runs an algorithm that determines whether the washer or dryer is currently running. Once the server has confidently determined that the washer or dryer has finished running, it sends an SMS (using Twilio) to one or more predefined phone numbers.
I’ll cover the implementation in more detail below. This post is broken down into three sections:
- The hardware
- The 3D printable enclosure
- The software
I’ll end with a conclusion and some closing thoughts.
Part 1: The Hardware
For this project, I purchased most of my parts from Adafruit, an online retailer of electronic components. The rest of the parts I purchased from Amazon. Here’s the bill of materials:
- Electric Imp
- April dev board for Electric Imp
- ADXL335 analog 3.3V +-3g accelerometer
- Quarter size perma-proto breadboard
- USB power supply
- USB A to Mini B cable
- Solid core wire
- 2 small rare earth magnets (available from any hardware store)
Electric Imp
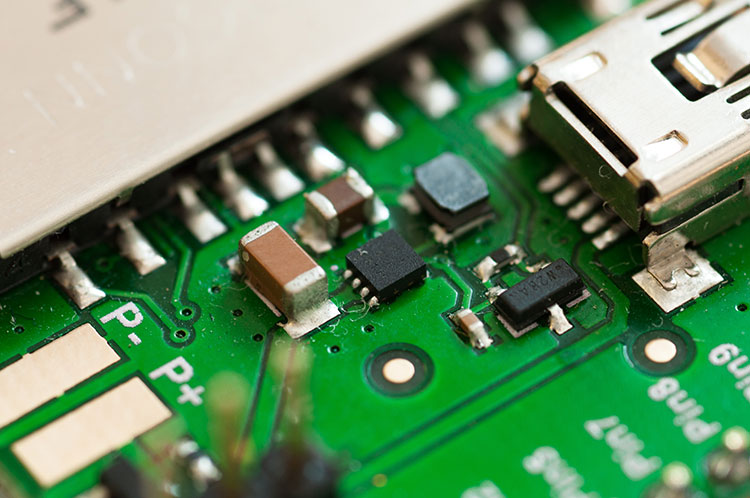
For this project, I chose to work with the Electric Imp microcontroller. The Electric Imp is a microcontroller in the form factor of an SD card with a 32bit Cortex M3 processor. What I find most interesting about the Electric Imp is that it also includes an 802.11b/g/n chip, making it one of the smallest WiFi enabled microcontrollers I’ve found. I also used the April development board, a breakout board from the Electric Imp team, which breaks out the pins on the imp and provides a mini USB connection for power. You can see that development board, a green circuit board, in the image beneath the “Hardware” header.
Configuring the Electric Imp with your WiFi credentials is done through a clever process called BlinkUp. The Imp itself contains a phototransistor, which enables you to program your WiFi credentials optically, via an app on your Android or iOS device. Once you install and configure the app, the display on your phone strobes in a pattern that the Imp recognizes, which programs the WiFi credentials into the Imp. The process only takes a few seconds, and it worked flawlessly for me the first time.
Once you’ve programmed your WiFi credentials onto the Imp, it will automatically connect to the Electric Imp cloud service. From there, you’re able to login to the web based IDE and program the imp via your web browser. The IDE handles deploying code updates to the device, as well. I’d like to see a GitHub integration, which would provide version control, so hopefully that’s on their roadmap.
ADXL335 Analog Accelerometer
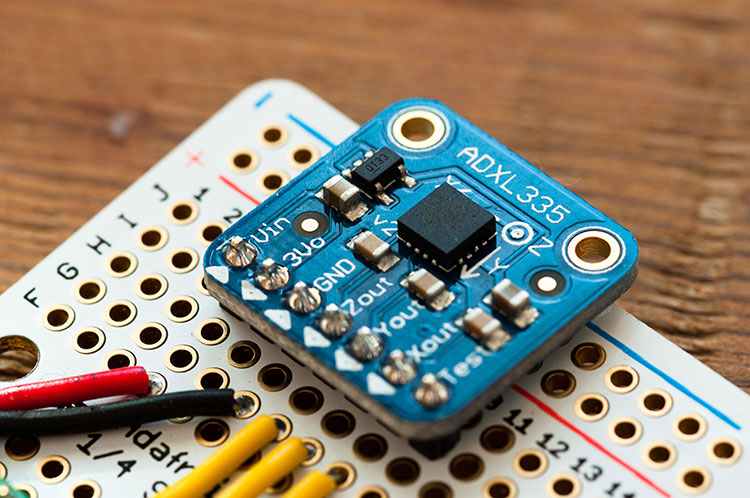
For the accelerometer (the component that measures the vibration of the washing machine / dryer), I chose the ADXL335. The ADXL335 is a 3.3V analog accelerometer sensitive to +- 3g. The device itself is widely used, and I found plenty of documentation online. In addition, Adafruit sells a breakout board (listed above in the bill of materials) that made including the device in my project an easy decision. The breakout board that Adafruit sells also allows you to connect the accelerometer to a 5V microcontroller, such as an Arduino.
Assembling the Hardware
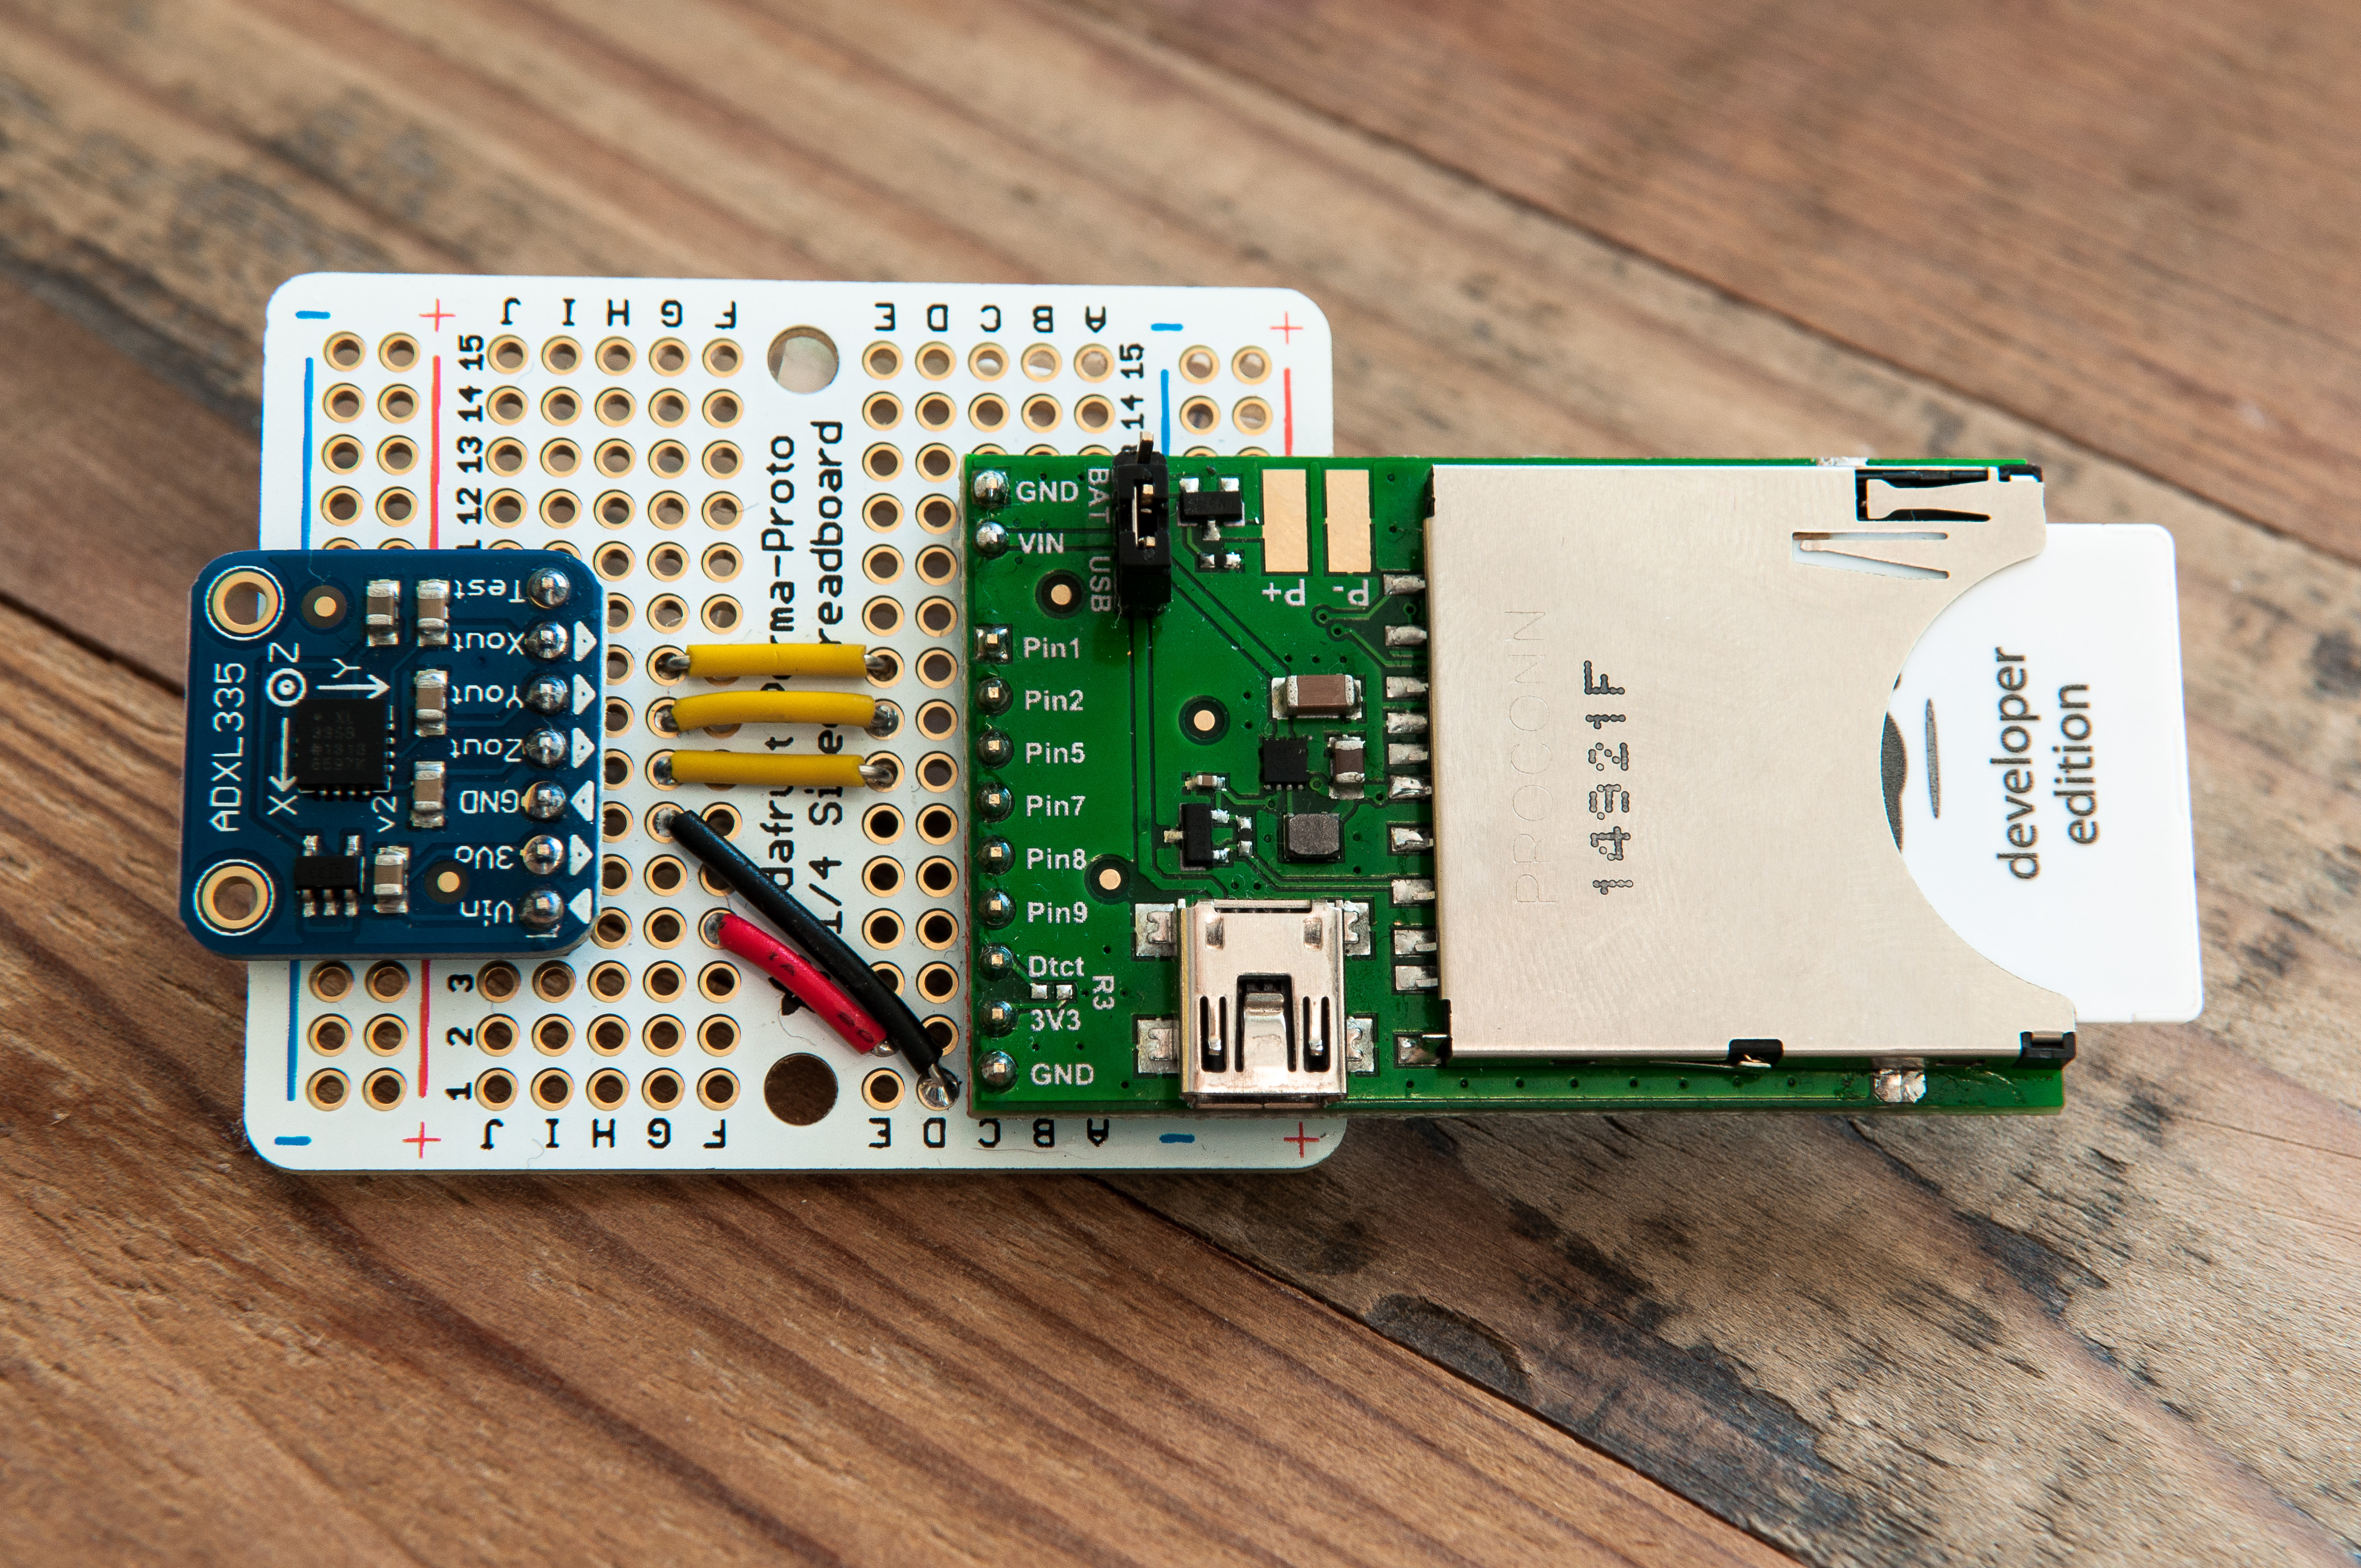
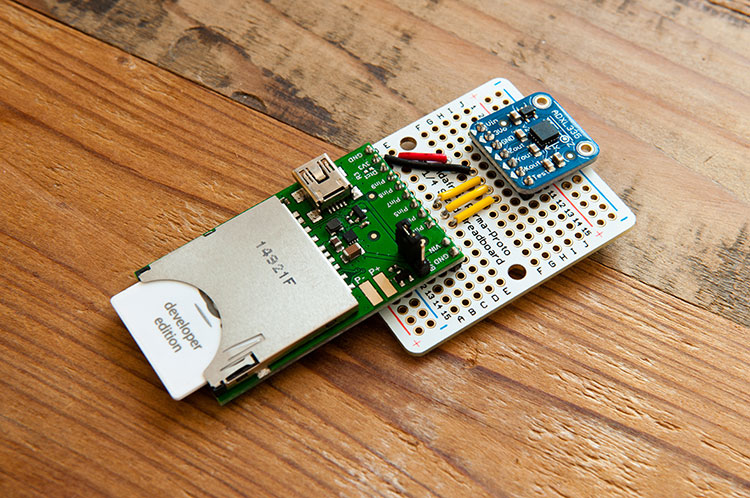
The assembly of the device is relatively straightforward. First, you will need to assemble the April development board and the ADXL335 breakout board by soldering the header pins onto the breakout boards. Next, you’ll need to solder both breakout boards into the perma-proto board. Lastly, you’ll solder in the 5 wires to enable the two components to communicate. If you intend to use the 3D printable enclosure, please ensure that the two components are mounted identically to the image above.
The picture above shows how the device looks when assembled, and here are the specifics:
- Pin 1 from Electric Imp is connected to the X-out pin on accelerometer.
- Pin 2 from the Electric Imp is connected to the Y-out pin on accelerometer.
- Pin 5 from the Electric Imp is connected to the Z-out pin on accelerometer.
- 3V3 pin from Electric Imp is connected to the Vin pin on accelerometer.
- GND pin from Electric Imp is connected to GND pin on accelerometer.
At this point you should be able to:
- Boot the device up with a USB power supply
- Program the Electric Imp to connect to your WiFi
- Log into the Electric Imp web based IDE to program the device
Part 2: The 3D Printable Enclosure
![]()
For this project, I wanted a custom enclosure that would enable the device to be sealed from dust and debris. I contacted a friend of mine, John Steenson, who agreed to help me design a 3D printable enclosure for the project. He has agreed to let me post the STL files for the case, which you can download and have 3D printed yourself. I had my case printed from a local printer that I found on the 3D Hubs service. I had a great experience with 3D Hubs, and highly suggest it if you’re trying to find a local 3D printer.
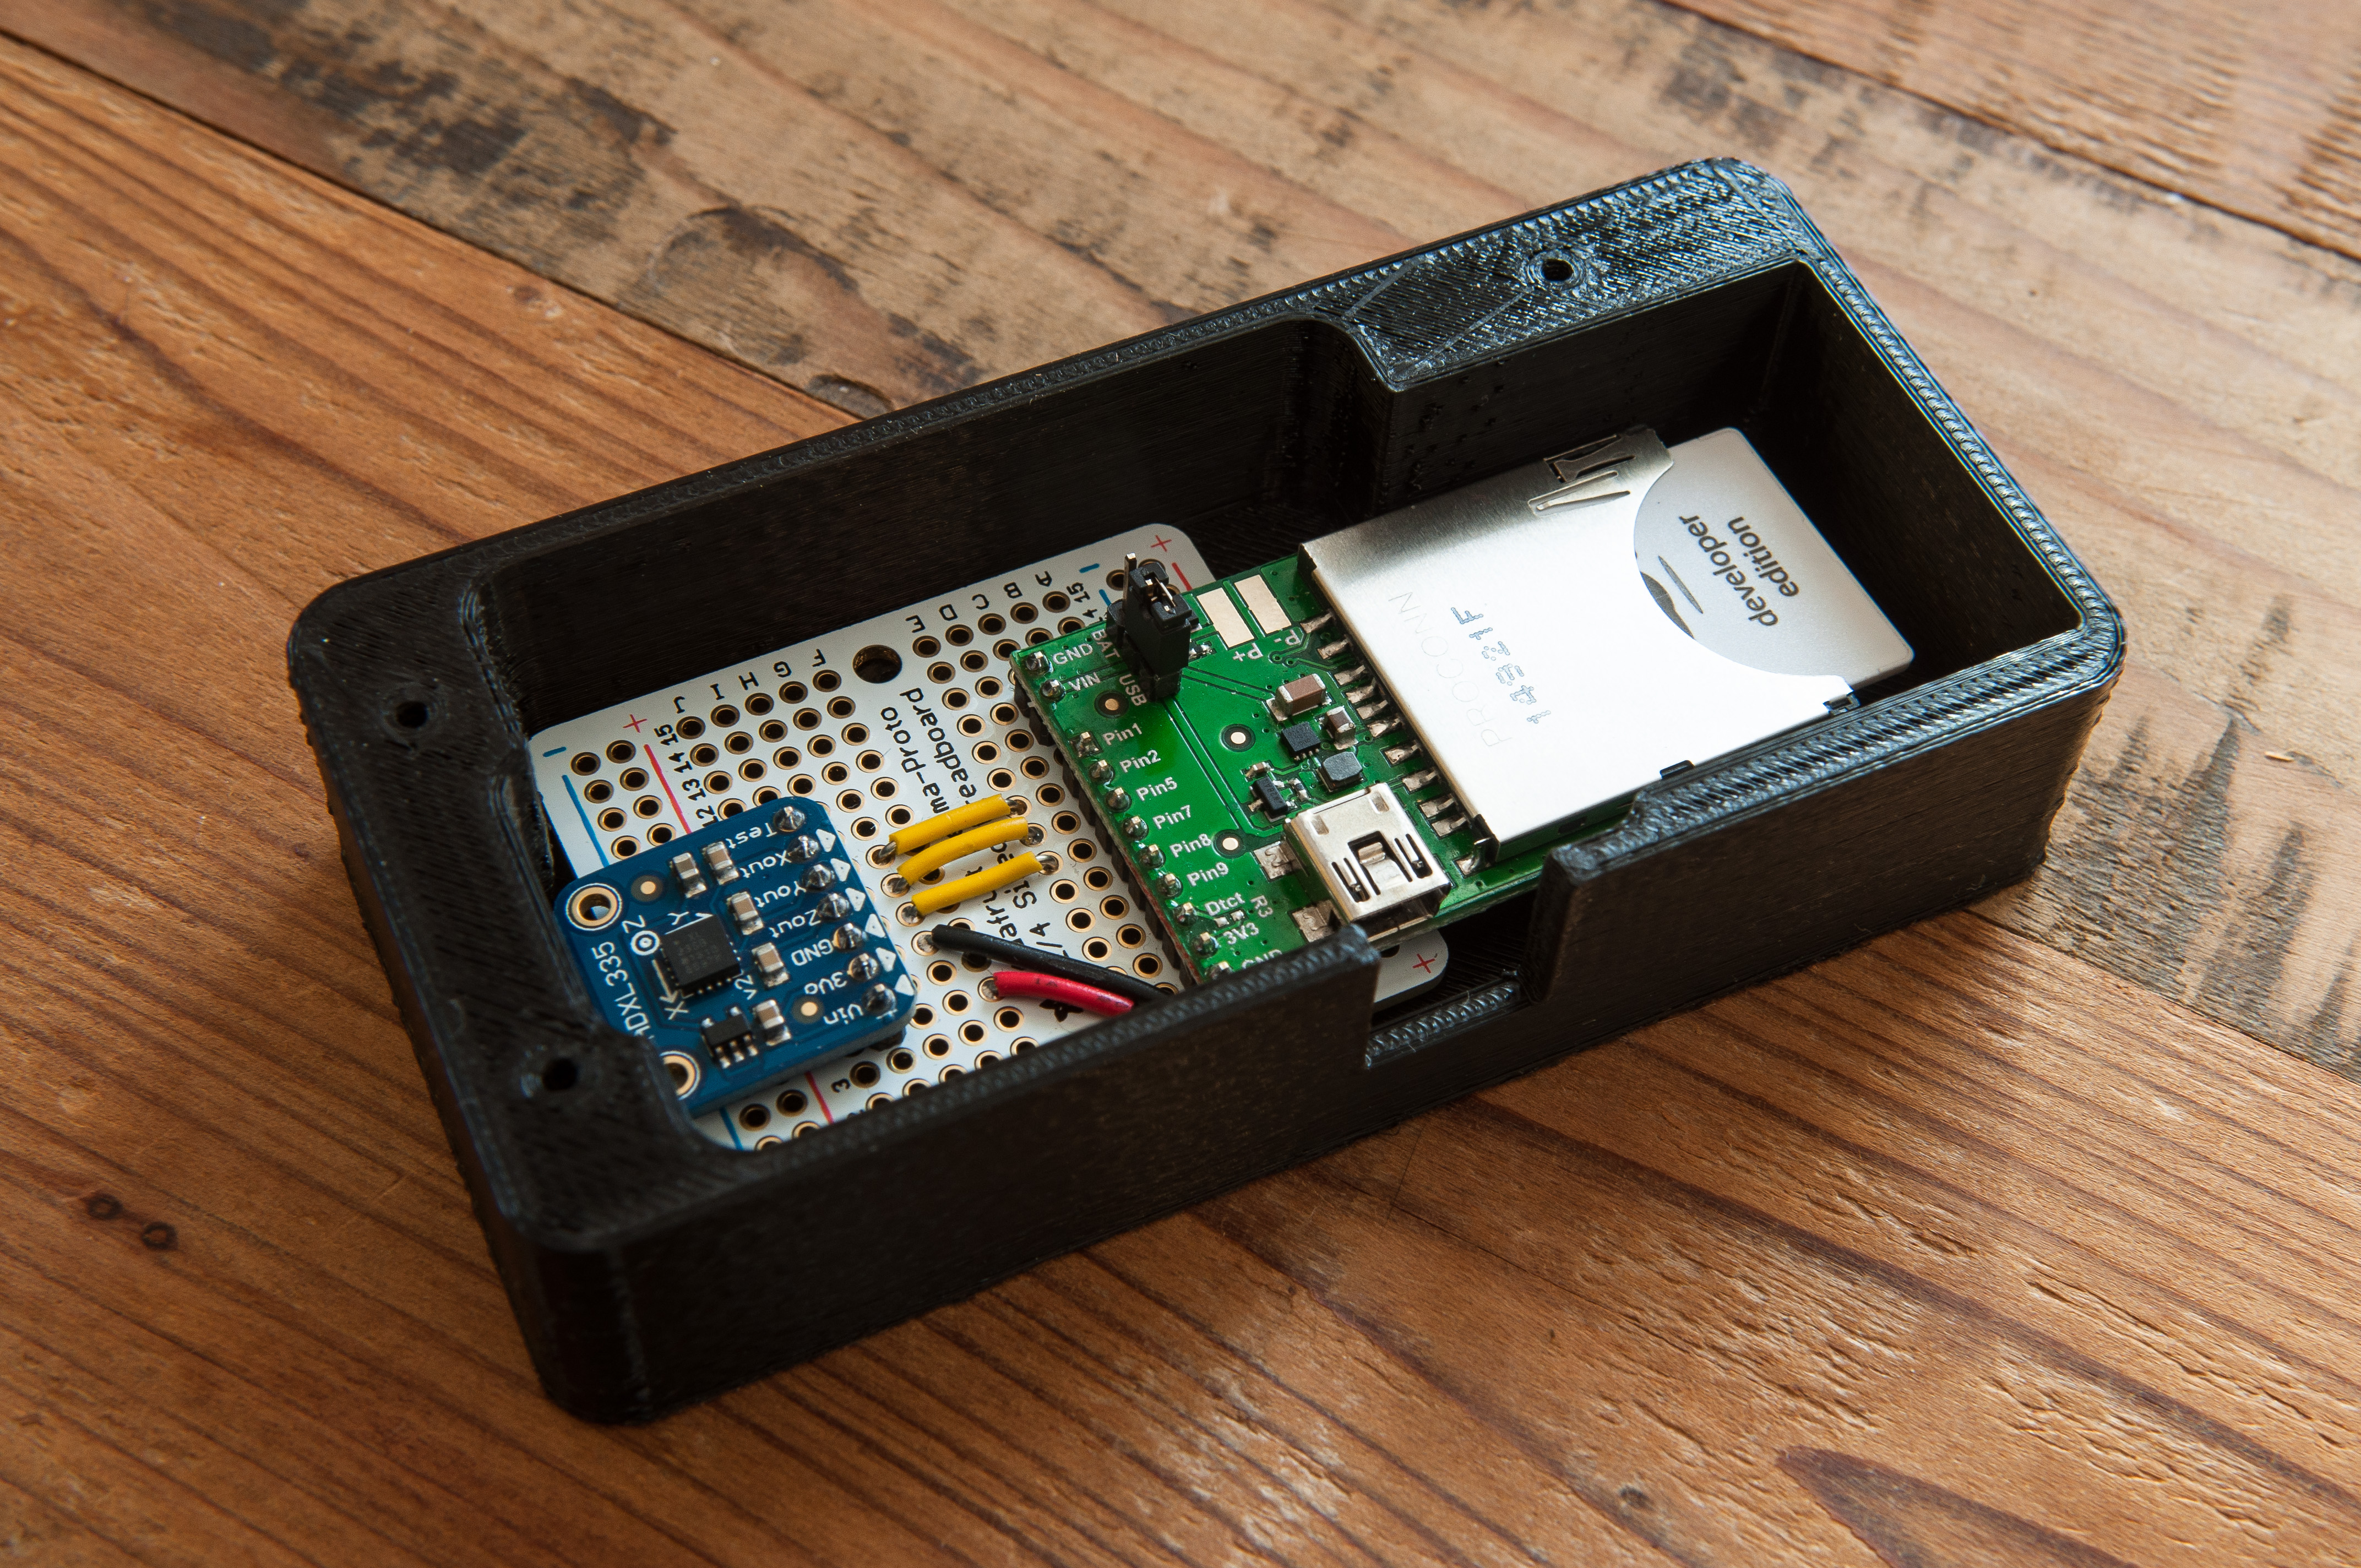
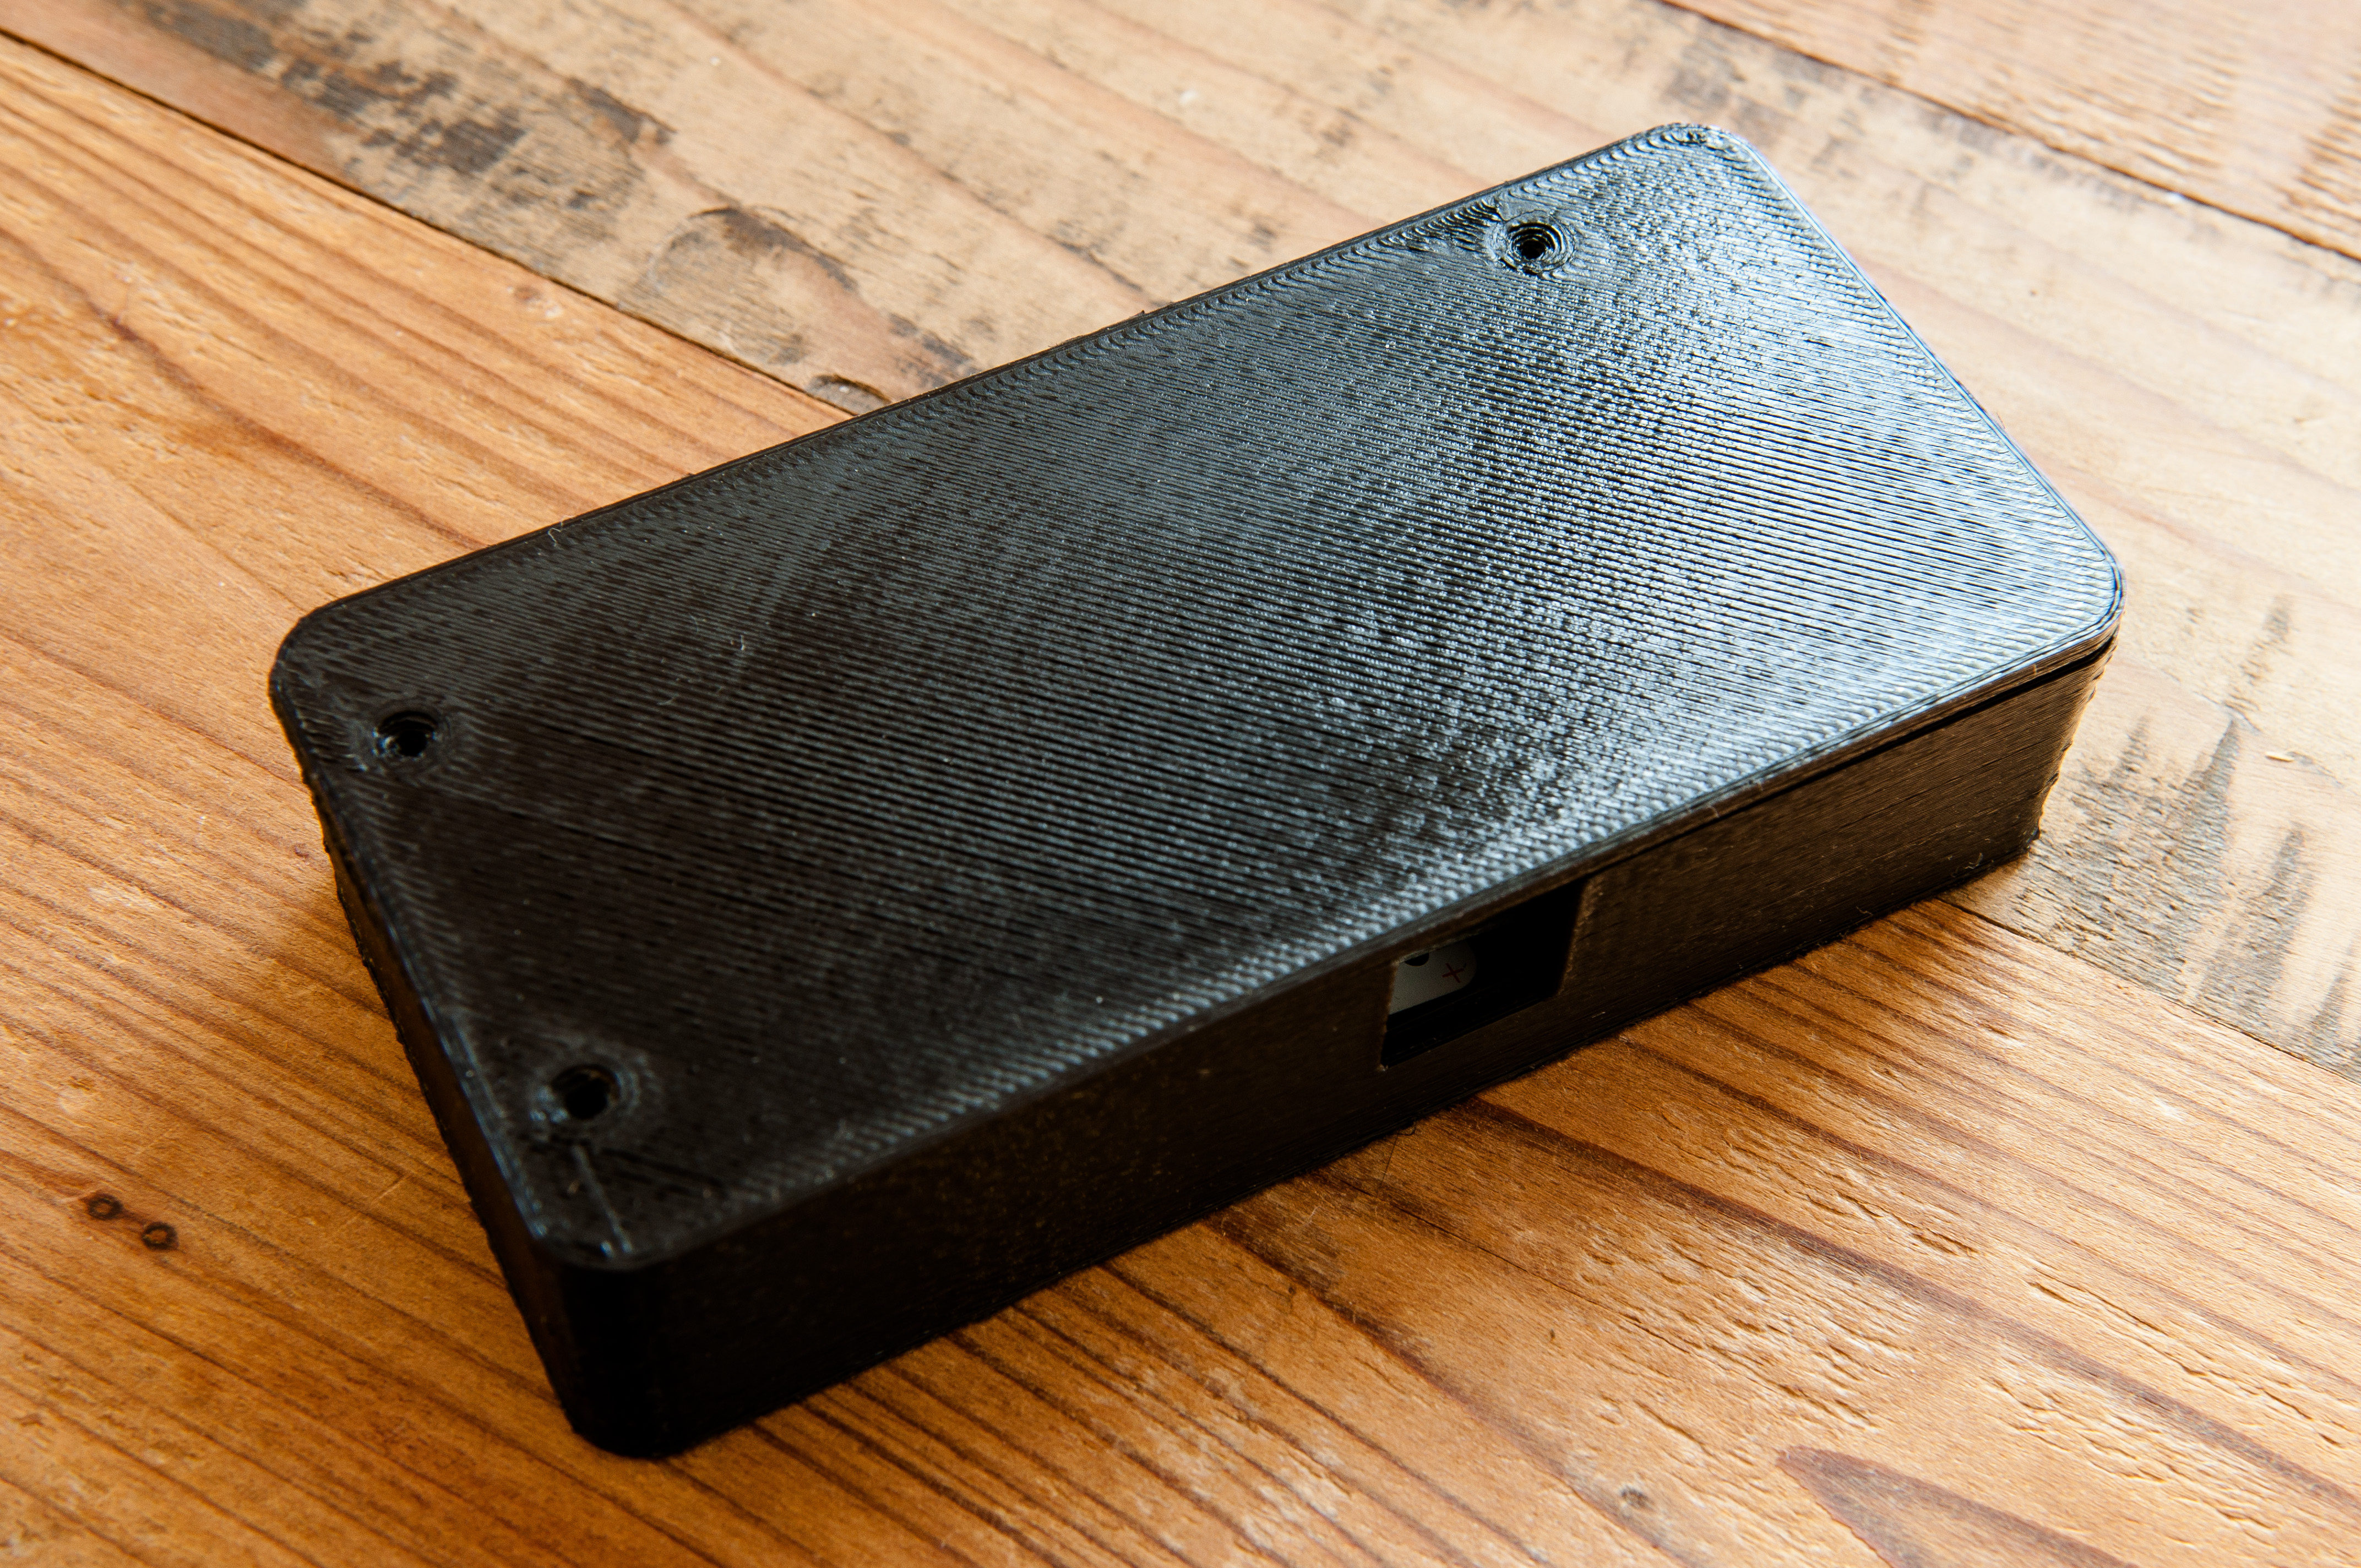
The above photos show the device mounted in the case (with and without the lid). Inside of the case, but beneath the device, I have attached (with two sided tape) the two rare earth magnets. I then placed a thin sheet of plastic between the magnets and the device to ensure there is no chance of electrical short. I have not found that the magnets interfere with the device in any way. The two magnets are what enables the device to attach to the washer or dryer.
STL files for the 3D printable enclosure:
Screws / nuts for mounting device within enclosure and securing lid:
All part numbers are from McMaster-Carr. Per my friend John, quantities noted are the quantities required for assembly, not package quantity. You’ll have some extra parts, but they’ll probably come in handy for future projects down the road.
- 3x - 91420A008
- 2x - 92000A015
- 2x - 93475A195
- 5x - 90592A004
- 1x - 8461K12 - Trim to fit
Part 3: Writing the Software
When writing software for the Electric Imp, you write two programs. The first program, called the “Device”, runs on the Electric Imp hardware. The second program, called the “Agent”, runs on the Electric Imp cloud. The Agent has the ability to send and receive HTTP traffic, making it a perfect candidate for the Twilio API, a RESTful API that allows you to send SMS messages.
For this project, the Device samples the accelerometer 50x a second. I found this to be frequent enough to get a clear picture for how much the washer or dryer is vibrating. For each sample, I determine the magnitude of the accelerometer vector and compute the percentage of change against the previous sample’s magnitude. I track the amount of change over 5 seconds (250 samples), and return that value to the Agent. In my testing, I found that the average reading when the machine was turned off to be between 100 and 250. When the washer or dryer are running, I find the samples vary between 275 and 6000 depending on what stage of the cycle the machine is in.
The Agent receives the total amount change over the past 250 samples, and compares that against a threshold to determine if the machine is ON or OFF. If the value is above the threshold, the device is experiencing enough vibration where it’s safe to call the machine ON. In my testing, I found 280 to be a good threshold to determine if the washer or dryer was running. Once the Agent receives N consecutive samples above the threshold, it enters the RUNNING state. Then, at some point in the future, once the Agent receives M consecutive samples below the ON threshold, it returns to the OFF state. These delays help take into account lulls in vibration during a typical laundry cycle (ex: filling the washer, rinse cycle, draining the washer). Depending on your appliances, you may need to adjust the thresholds in the Agent to reduce false positives. Finally, when returning to the OFF state, if the device was in the RUNNING state, an SMS notification is emitted (via Twilio) to each phone number stored in the phoneNumbers array.
If you’d like to read more about how to process the data coming off an accelerometer, I found A Guide To using IMU (Accelerometer and Gyroscope Devices) in Embedded Applications to be an extremely informative read.
Note: The Agent code requires you to setup a Twilio account and enter your Twilio credentials before you can send any messages. Twilio, at the time of writing this article, charges $0.01 per text message. At the rate I do laundry, it should cost < $2 a year to send these text messages.
Note2: If you would like to log all of your data to a persistent data store (either to show on a web page, or just to analyze output), Firebase is a great option, and they have a free tier. Just change logToFirebase to be true and enter your Firebase URL if you want to enable this feature.
You may also view this code on GitHub.
Here is the code for the Device, which reads in and processes the accelerometer data:
1 2 3 4 5 6 7 8 9 10 11 12 13 14 15 16 17 18 19 20 21 22 23 24 25 26 27 28 29 30 31 32 33 34 35 36 37 38 39 40 41 42 43 44 45 46 47 48 49 50 51 52 53 54 55 56 57 58 59 60 61 62 63 64 65 66 67 68 69 70 71 72 73 | |
Here is the code for the Agent, which determines when to send an SMS
1 2 3 4 5 6 7 8 9 10 11 12 13 14 15 16 17 18 19 20 21 22 23 24 25 26 27 28 29 30 31 32 33 34 35 36 37 38 39 40 41 42 43 44 45 46 47 48 49 50 51 52 53 54 55 56 57 58 59 60 61 62 63 64 65 66 67 68 69 70 71 72 73 74 75 76 77 78 79 80 81 82 83 84 85 86 87 88 89 90 91 92 93 94 95 96 97 98 99 100 101 102 103 104 105 106 | |
After loading these two pieces of software onto the Electric Imp (via the web IDE), you should be ready to install the device in your home! Installation is simple - just magnetically attach the device to any metal service on the washer or dryer. Give it a whirl by doing a load of laundry and watching the log files (via the web IDE). If all goes well, you should receive a text message a few minutes after the load of laundry completes.
Conclusion
I set out to build a minimally invasive device that progressively enhanced an appliance into the digital age, which didn’t physically modify the appliance in any way. During the project I had the opportunity to work with a few new technologies - the Electric Imp, an accelerometer, and 3D printing. All in all, I’d say the project was a success. The device is currently hooked up to my washer, and it works well in it’s current state.
This project came out of a (relatively) trivial need - to know when a load of laundry is done when you aren’t in close proximity to the washer or dryer. I thought it would be clever to receive a text message when the laundry is done, since all phones support SMS and Twilio has made interacting with SMS easy. This also gets around the need to download or install a native app on your phone.
I do recognize there are other approaches to solving this problem - monitoring the power output of the appliance, listening for the buzzer with a microphone, or placing a photodiode over a “done” indicator - but I ultimately chose the accelerometer because I wanted to gain experience working with the sensor.
While I do not believe I’ll be spending much additional time on this project, there are a number of potential enhancements that I see:
- Adding a battery, to make the device portable.
- Swapping out a WiFi chip for a GSM chip, allowing you to take the device to a laundromat.
- Designing a custom circuit board, to dramatically reduce the size of the device.
- Creating a waterproof (and heat tolerant) device/enclosure so you can place the device inside the washer/dryer. This would be more secure than leaving a device on top of a machine.
Hopefully you found this post helpful if you’re trying to implement a similar device yourself. If you have any questions, feel free to ask in the comments. If you’re interested in having one of these devices for yourself, but don’t want to build one, send me an email at alex@alexba.in and we can work something out.