June 8th 2013 Update: I have completed a soldered circuit prototype, complete with a full parts list and high resolution build pictures. Please read Open Source Universal Remote - Parts & Picturse to learn more.
March 9th 2013 Update: I have formalized the schematic and parts list that I’m using and have made it available on Upverter. Please read RaspberryPi IR Schematic for LIRC for more details.
March 4th Update: I’ve written a follow up post that describes how to control your RaspberryPi universal remote from the web. Please check out Controlling LIRC from the web for instructions on how to install and configure the software.
Preface
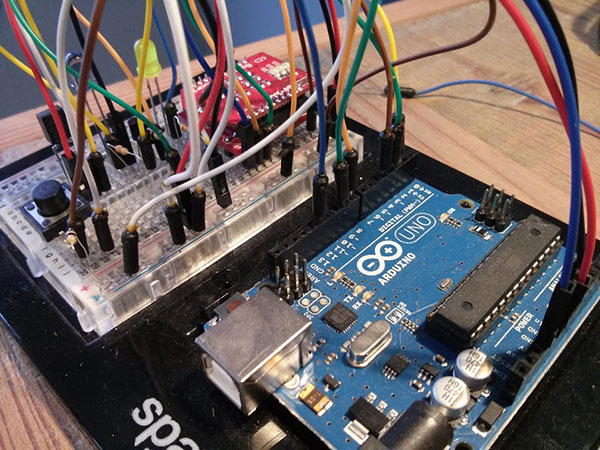
In July 2012 I wrote a post called Universal remote experiments about creating a web controlled universal remote from the electronics up. The first platform I started with was an Arduino Uno. After much experimentation I learned that asking an Arduino to maintain a WiFi connection, maintain a TCP socket with a host computer, and send/receive IR signals was a bit much. With the limited memory and storage I had a hard time managing memory and keeping the system stable. I was, however, able to build a functional prototype:
At the end of that post I had decided to rebuild the project on a RaspberryPi. I chose the RaspberryPi because I wanted a single device to host a web server in addition to being able to handle the IR transmitting and receiving. Given that the RaspberryPi runs Linux I could rely on it’s stable TCP/IP implementation and use open source software packages like nginx and NodeJS to build a web application.
This post will serve as ‘part two’ of that project and cover how to install and configure LIRC on a RaspberryPi.
LIRC - Linux Infrared Remote Control
LIRC is a mature and stable open source library that provides the ability to send and receive IR commands. Thanks to the contributions of ar0n, LIRC support is now included by default in the latest version of Raspbian OS. If you’d like to see the details of the RaspberryPi GPIO integration check out the pull request he opened for it a while back.
Setting up LIRC on the RaspberryPi
Getting LIRC setup on the RaspberryPi is significantly easier now than it was six months ago.
You must be running on the latest firmware and OS for this guide to work. If you’re new to the RaspberryPi, or you haven’t upgraded to the latest firmware and OS, I recommend following my RaspberryPi Quickstart guide to get your RaspberryPi up and running on the latest OS and firmware.
First, we’ll need to install and configure LIRC to run on the RaspberryPi:
sudo apt-get install lirc
You have to modify two files before you can start testing the receiver and IR LED. I modified these files based on a thread I found on the RaspberryPi forums. If you would like to read more about these changes please check out the LIRC GPIO driver for homebrew adapter thread. In particular, read through the posts by rudiratlos on page five, as he posts his configuration files.
Add this to your /etc/modules file:
lirc_dev
lirc_rpi gpio_in_pin=23 gpio_out_pin=22
Change your /etc/lirc/hardware.conf file to:
########################################################
# /etc/lirc/hardware.conf
#
# Arguments which will be used when launching lircd
LIRCD_ARGS="--uinput"

# Don't start lircmd even if there seems to be a good config file
# START_LIRCMD=false

# Don't start irexec, even if a good config file seems to exist.
# START_IREXEC=false

# Try to load appropriate kernel modules
LOAD_MODULES=true

# Run "lircd --driver=help" for a list of supported drivers.
DRIVER="default"
# usually /dev/lirc0 is the correct setting for systems using udev
DEVICE="/dev/lirc0"
MODULES="lirc_rpi"

# Default configuration files for your hardware if any
LIRCD_CONF=""
LIRCMD_CONF=""
########################################################
Now restart lircd so it picks up these changes:
sudo /etc/init.d/lirc stop
sudo /etc/init.d/lirc start
January 25th 2015: Marc W. in the comments pointed out that in the 3.18.x RaspberryPi firmware you must modify one additional file for the lirc-rpi kernel extension to be loaded:
Edit your /boot/config.txt file and add:
dtoverlay=lirc-rpi,gpio_in_pin=23,gpio_out_pin=22
Reboot your RaspberryPi after making this change.
Wiring up the IR transceiver
June 8th 2013 Update: I’ve finished a more permanent build and documented the process in my Open Source Universal Remote - Parts & Picturse blog post.
March 9th 2013 Update: I have formalized the schematic and parts list that I’m using and have made it available on Upverter. Please read RaspberryPi IR Schematic for LIRC for more details.
To send and receive IR signals from your RaspberryPi you’ll need to wire up an IR LED and an IR receiver and tell LIRC where to find them. Here are the parts I purchased for my own project:
- 940nm IR LED 20deg - 20 degree viewing angle. Bright and tuned to 940nm wavelength
- 940nm IR LED 40deg - 40 degree viewing angle. Bright and tuned to 940nm wavelength.
- 38khz IR Receiver - Receives IR signals at remote control frequencies
- PN2222 Transistor - Transistor to help drive IR LED
- 10k Ohm resistor - Resistor that goes between rPi GPIO and the PN2222 transistor
If you don’t already have wires and a breadboard to prototype with, you may be interested in:
- Mounting plate + breadboard - A mounting plate + breadboard for your RaspberryPi
- Adafruit Pi Cobbler Breakout Kit - Breakout kit for getting the GPIO pins onto the breadboard
- Breadboard wire bundle - Bundle of wires to use in the breadboard
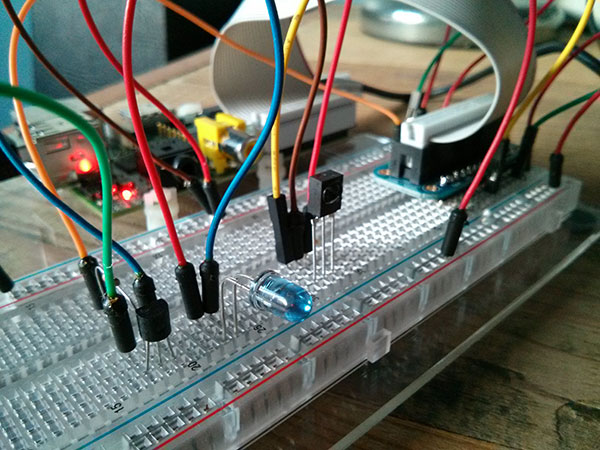
For this project I wired up the IR LED to GPIO pin 22 and the IR Receiver to GPIO pin 23. You’ll see that mentioned in the /etc/modules file above.
Please check out these diagrams for information and schematics about how to wire everything up:
- RasperryPi IR Schematic for LIRC - My own schematic, which I’ve been using myself.
- RaspberryPi lirc_rpi - Contains hardware and schematics for the raspberryPi
- TV-B-Gone Schematic - Info on wiring up IR leds / receivers
- GPIO pinout for RaspberryPi - GPIO pinout diagram
Here’s a picture of my initial schematic (view the updated one here) wired up to my RaspberryPi with all of the components tested and working:
Testing the IR receiver
Testing the IR receiver is relatively straightforward.
Run these two commands to stop lircd and start outputting raw data from the IR receiver:
sudo /etc/init.d/lirc stop
mode2 -d /dev/lirc0
Point a remote control at your IR receiver and press some buttons. You should see something like this:
space 16300
pulse 95
space 28794
pulse 80
space 19395
pulse 83
space 402351
pulse 135
space 7085
pulse 85
space 2903
If you don’t, something is probably incorrectly configured. Triple check that you’ve connected everything properly and haven’t crossed any wires. I highly recommend referring to the schematics I linked to above. There is also some trouble shooting advice in the RaspberryPi Forum thread I linked to above. Finally - you may want to do this in a dark room. I found that my desk lamp and overhead light would cause the IR receiver to think it was receiving valid signals.
Testing the IR LED
You’re going to need to either find an existing LIRC config file for your remote control or use your IR receiver to generate a new LIRC config file. In my case I created a new LIRC config file. To do this, read the documentation on the irrecord application that comes with LIRC.
When using irrecord it will ask you to name the buttons you’re programming as you program them. Be sure to run irrecord --list-namespace to see the valid names before you begin.
Here were the commands that I ran to generate a remote configuration file:
# Stop lirc to free up /dev/lirc0
sudo /etc/init.d/lirc stop

# Create a new remote control configuration file (using /dev/lirc0) and save the output to ~/lircd.conf
irrecord -d /dev/lirc0 ~/lircd.conf

# Make a backup of the original lircd.conf file
sudo mv /etc/lirc/lircd.conf /etc/lirc/lircd_original.conf

# Copy over your new configuration file
sudo cp ~/lircd.conf /etc/lirc/lircd.conf

# Start up lirc again
sudo /etc/init.d/lirc start
Once you’ve completed a remote configuration file and saved/added it to /etc/lirc/lircd.conf you can try testing the IR LED. We’ll be using the irsend application that comes with LIRC to facilitate sending commands. You’ll definitely want to check out the documentation to learn more about the options irsend has.
Here are the commands I ran to test my IR LED (using the “yamaha” remote configuration file I created):
# List all of the commands that LIRC knows for 'yamaha'
irsend LIST yamaha ""

# Send the KEY_POWER command once
irsend SEND_ONCE yamaha KEY_POWER

# Send the KEY_VOLUMEDOWN command once
irsend SEND_ONCE yamaha KEY_VOLUMEDOWN
I tested that this was working by pointing the IR led at my Yamaha receiver and testing whether I could turn it on and adjust the volume.
Success!
That’s it! You’ve now successfully installed and configured LIRC on your RaspberryPi. You can add additional remote control configuration files to your /etc/lirc/lircd.conf file to control multiple remotes.
Resources
Here’s a few resources to explore if you’d like to learn more:
- lirc - LIRC home page
- RaspberryPi lirc_rpi GPIO driver - ar0n’s lirc_rpi page
- LIRC GPIO driver for homebrew adapter
- TV-B-Gone Schematic
My next steps
The next step for my web controlled universal remote project is going to be finding or creating remote files for all of the IR devices in my house. Once I’ve gathered all of those files together and placed them in the lircd.conf file I’ll begin work on the web application server.
I’ll cover all of that in a future post.
Questions? Comments?
Please let me know if you have any questions or run into any trouble while running through these steps. All of these steps were tested and working on the date this post was published.